How to Size Wire for Your Camper Van Build: AWG Gauge Guide & Chart
- May 1, 2025
Learn how to size wire for your van electrical system — calculate amps, measure wire runs, and find the correct AWG gauge to prevent fires and voltage drop.
Table of Contents
- Principle 1: Every Electrical Component In Your DIY Camper Van's Electrical System Needs to be Wired With An Appropriate Wire Size.
- Principle 2: Wire Length and Amperage Determine Wire Size
- Principle 3: Power is Lost As It Flows Along the Wire
- Principle 4: Not All Wires Are the Same
- Principle 5: Consult A Wire Sizing Chart
- Common Wire Sizing Scenarios for Camper Van Builds
Affiliate Disclosure: This website may contain affiliate links. The creator of this website may earn a commission from qualifying purchases made through these links at no additional cost to you.
How to Size Wire for Your Camper Van Build: AWG Gauge Guide & Chart
Getting started on your van conversion will feel daunting at first. Especially when you begin planning your electrical system. You might be looking at solar panels, van wire options, battery options, fuses, inverters, and other electrical items and tools for the first time in your life.
We're not going to overwhelm you by writing about circuits, 120v outlets, inverters, the grid, or even batteries. This article is meant to guide you with a high level orientation to wire size (also referred to as wire gauge) selection. If you understand the core principles of van wire selection, you're on your way to make your campervan electrical system design decisions safely and with confidence.
Principle 1: Every Electrical Component In Your DIY Camper Van's Electrical System Needs to be Wired With An Appropriate Wire Size.
Wires move electricity from one component to another. For our purposes, we will refer to the electricity moving through a wire as current. Not every wire in your van's electrical system is going to move the same amount of current. A refrigerator requires a higher current than a lightbulb, for instance.
Current is measured in amps. So every wire in our system must be sized large enough to safely carry the expected amount of amps. What happens if the wire is sized too small? If you pass too many amps through too small a wire, the wire will heat up and cause a fire.
Taking the time to size our wires prevents this. So before you begin purchasing wire for your van build, you must first understand how many amps will be moving between your components. If you know the wattage of a device and the voltage powering it, simply divide the watts by the voltage — or use our amperage calculator to do it for you. So in a device that draws 120 watts off a 12V battery bank, the wire will have to be large enough to handle at least 10 amps.
\text{ Electric Current (I)} = \frac{120\text{ watts}}{12\text{ volts}} = 10\text{ amps} As best safety practice, experts recommend multiplying the expected max amperage by 1.25. This provides a safety margin. So in the example above, 10 amps x 1.25 equals 12.5 amps. The wire should be able to handle at least this value.
Principle 2: Wire Length and Amperage Determine Wire Size
Once you calculate the amperage moving between all your components, you need to determine the length of the wires connecting them. It helps to draw out a wire diagram as you go through this process. It can be a lot to keep track of.
If the wire running from the solar panel to the solar charge controller is 20 feet, then the length we use to determine our wire size is forty feet, since there are two wires (positive and negative) connecting the solar panel to the solar charge controller.
In addition to this, there are derating factors to consider. Derating values are correction factors that help us account for the influence of heat. For example, according to the National Electrical Code Table 310.15(B)(3)(a), if you have 8 wires bundled together, the allowable maximum current a wire can safely carry must be multiplied by 0.70. So a wire that would normally carry 25 amps safely, when bundled in a group of 8 where heat is less likely to dissipate, can only safely carry 17.5 amps (25 * 0.70 = 17.5). This means a larger diameter wire would be required to safely carry the expected amperage.
National Electrical Code Table 310.15(B)(3)(a) and Table 310.15(B)(2)(a) are relevant here, and provide derating factors for ambient temperature and wire bundling.
Principle 3: Power is Lost As It Flows Along the Wire
Energy is lost as it passes through a wire. This is something that must be considered when sizing wires. The energy lost is referred to as voltage drop. As a rule of thumb, we recommend sizing your wires for a 3% voltage drop. This simply means the wire is sized so that we won’t lose much power along the length of the wire run. If you pay for solar panels but experience excessive voltage drop along the wire run, you aren’t able to harvest that lost power. So you’re wasting your equipment’s potential—and your money.
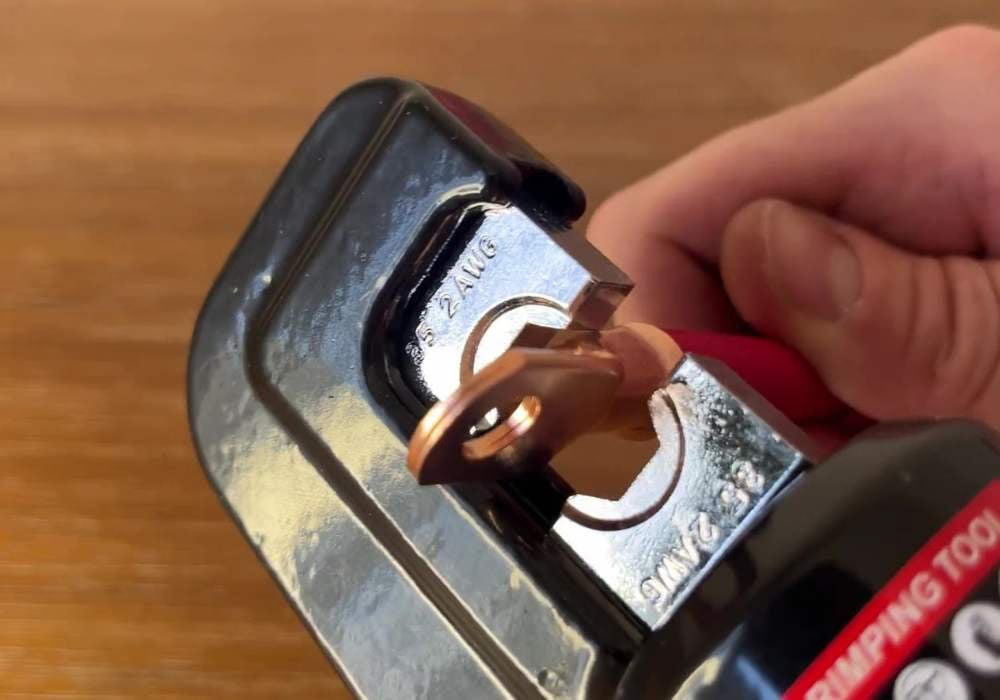
Principle 4: Not All Wires Are the Same
In addition to the differences in diameter, or gauge, which can be sold as AWG (American Wire Gauge) or you may see referenced in millimeters squared, or the cross-sectional area of copper. Wires can be made of solid strand copper or multi-strand copper.
Wires can also be made from aluminum. Not only this, but the insulation over a wire differs drastically. For van's we recommend multi-strand copper, as it's less likely to snap completely due to vibration. And we've found that the challenges faced by DIY camper van electrical systems are similar to those in boating, so we recommend marine grade wire, as its often tin coated to help with corrosion. Just keep these in mind as we look at an example of a wire sizing chart.
Principle 5: Consult A Wire Sizing Chart
The below wire sizing chart is made available by the marine wire manufacturer Ancor. Ancor knows the wires have an insulator rated to 105 degrees Celsius and that the wire is made from multi-strand tinned copper, so the chart accounts for these. Generic charts or online calculators might ask you these details, which is why we mentioned them in Principle 4.

As you can see on the top right of this chart, the wire size recommendations are only relevant for 3% voltage drop in 12 Volt electrical systems. Disclaimer: It could be dangerous to use this chart for a 24V or 110V system.
If we know the wire run is 20 feet and the amperage running between the components (with the 1.25 safety margin added) is 25 Amps, we locate these rows and columns and find where they intersect to get the appropriate wire size, in this case the diameter is reported in AWG.

As you can see, the 20-foot length row intersects with the 25 Amp column at the value of 6 AWG. So we know that our wire needs to be sized as 6 AWG.
Common Wire Sizing Scenarios for Camper Van Builds
Now that you understand the principles, let's walk through the wire sizing questions that come up most often in van builds. These examples assume a 12V system, multi-strand tinned copper wire, and a 3% voltage drop target. Always verify against your specific wire manufacturer's chart, but these will give you a reliable starting point.
What Wire Gauge Do I Need for a 100A Fuse?
If your fuse is rated at 100 amps, the wire it protects must be able to safely carry at least 100 amps. For a short run of 5 feet or less (remember to double for positive and negative), 2 AWG wire is typically appropriate. For runs up to 10 feet, you may need 1/0 AWG. The fuse protects the wire, so the wire's ampacity must always meet or exceed the fuse rating. This scenario is common when wiring a large inverter to a battery bank or bus bar.
What Gauge Wire for Solar Panels to Charge Controller?
Solar panel wiring depends on the panel's maximum current output and the distance to your charge controller. A typical 200W panel on a 12V system produces roughly 11 amps. With the 1.25 safety multiplier, that's about 14 amps. For a 15-foot wire run (30 feet doubled), most sizing charts recommend 8 AWG. If your panels are roof-mounted and the charge controller is directly below, a shorter run of 5 to 10 feet may allow you to use 10 AWG. When wiring two panels in parallel, the amperage doubles, so size accordingly.
What Wire Size for a 12V Fridge or Refrigerator?
A 12V compressor fridge like the Dometic CFX or Iceco typically draws between 4 and 6 amps during the compressor cycle. With the 1.25 safety multiplier, plan for about 7.5 amps. For a wire run of 10 feet or less (20 feet doubled), 12 AWG wire is usually sufficient. If your fridge is further from the battery bank, bumping up to 10 AWG ensures you avoid excessive voltage drop that can cause the compressor to cycle inefficiently.
What Wire Gauge for LED Lights?
LED lighting circuits draw very little current — a typical puck light pulls under 1 amp, and even a strip of LEDs rarely exceeds 3 to 4 amps total. For most interior lighting runs of 15 feet or less, 16 AWG or 14 AWG wire is more than adequate. Since these are low-draw circuits, voltage drop is less of a concern, but using the correct gauge still matters for fire safety. Protect each lighting circuit with an appropriately sized fuse, typically 5 to 10 amps.
What Wire Gauge for a DC-DC Charger?
DC-DC chargers like the Renogy DCC series or Victron Orion typically draw between 20 and 50 amps depending on the model. A 40A charger with the 1.25 safety multiplier requires wire rated for 50 amps. For a 10-foot wire run (20 feet doubled) at 50 amps, 6 AWG wire is a common recommendation. Keep in mind that the wire run from the starter battery to the DC-DC charger often passes through the firewall, so measure this distance carefully — it's usually longer than expected.
Explore More Resources and Electrical System Design Descriptions from Build to Roam
Check out our solar power calculator, where you can select a desired solar panel size from a drop-down menu and our calculator provides wire and fuse size recommendations. This is great information for planning out your camper van electrical component purchases or even if you're just considering an electrical upgrade on an existing build.
And if you're unsure of how big your battery bank needs to be, take a look at our energy demand calculator. This calculator helps you determine how much energy you'll use in a day.