How To Monitor Power In Your Van's Auxiliary Battery Bank
- Dec 22, 2025
Learn how to install and configure battery shunts and monitors in your van's electrical system to track power usage and battery state effectively.
Table of Contents
Affiliate Disclosure: This website may contain affiliate links. The creator of this website may earn a commission from qualifying purchases made through these links at no additional cost to you.
How To Monitor Power In Your Van's Auxiliary Battery Bank
Van life is rewarding. But it will require you to learn new skillsets to thrive. One of these skills is having an intimate understanding your electrical system. Installing a shunt and battery monitor in your van's electrical system gives you the ability to monitor the incoming power, outgoing power, and battery state.
In this article, you will learn how to install and configure battery shunts and monitors in your van's electrical system to track power usage and battery state effectively.
What Are The Battery Shunt and Battery Monitor?
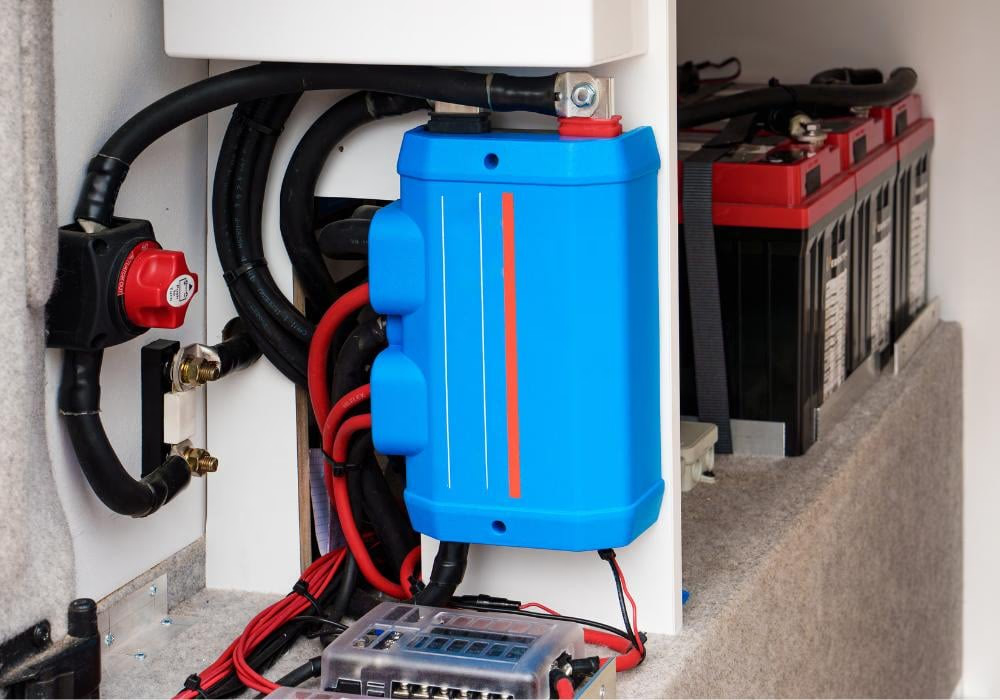
The battery shunt is a component installed inline with the battery wiring that can then communicate details related to the incoming electrical power, outgoing electrical power, and battery charge state via the battery monitor. Some battery shunts are now Bluetooth compatible, allowing van lifers the ability to view charging data via apps on their phones. Below is an image of the Victron SmartShunt:

A battery monitor calculates amp-hours consumed and the state of charge of the auxiliary battery bank. Amp-hour consumption is calculated by the current flowing in or out of the battery. This data is gathered via the shunt. There is often a visual component to the battery monitor, such as an LCD screen that displays the percent charge of the auxiliary battery bank. Below is an image of a Victron BMV series battery monitor:

How to Install a Battery Shunt and Battery Monitor
The shunt is installed inline on the negative cable. The shunt must be capable of handling the expected maximum amperage passing through the electrical system. I personally sized mine to exceed the maximum discharge current my battery bank was capable of. I found this on the battery data sheet. The shunt's maximum amperage is generally part of the product name, such as 500A Battery Monitor With Shunt. It can also be found in the shunt product data sheet.
There is a thin gauge red positive power cable that energizes the shunt. This red cable must be connected along the positive path on the battery. Most shunt manuals will show a diagram where this wire is connected directly to the auxiliary battery positive post, like this diagram from the Victron SmartShunt Quick Installation Guide shown below:

In the image above, the blue component is the shunt. As you can see, it is installed inline on the negative wire leaving the battery. The thin gauge red wire energizing the shunt is connected directly to the battery positive post.
The battery monitor is connected to the shunt via something like an ethernet cable, as shown in the Victron BMV 700 Quick installation guide snippet shown below:

How To Program Your Battery Shunt and Battery Monitor
Once the components are installed, you must configure the monitoring system to match your electrical system. These settings are most often set in an associated app. You must set the battery capacity (for example, 400 Amp-Hours) and the battery bank voltage (lithium batteries have a nominal voltage of 12V with a charged voltage up to 14.6V). This part can feel overwhelming since it can be confusing. For this reason, most apps have presets for specific battery types, such as Lithium and ACM.
With these values set, the battery monitor can now accurately report the battery bank state.
Battery Shunt and Monitoring Options Available on the Market
Most brands offer their own shunt and battery monitoring solution. Below I highlight two of the most common options used in van builds.
Victron
I highlighted the Victron SmartShunt and BMV Series Battery Monitors in the examples above. In addition to these two items, Victron offers a Cerbo GX smart hub, that allows users to control systems via a touch screen interface. This smart hub is overkill for many van builds, but is often included in the high end professional builds.
Renogy
Renogy has a couple offerings, but their 500A Battery Monitor With Shunt has the highest user rating.

Other Options
There are several lesser known brands with options available on Amazon. My personal ethos when it comes to electrical components is that quality matters. One failed component could result in a van fire.